After we talked about how to organize your playbook earlier this week, we focused mostly on creating and editing your categories. We specifically talked about it from the point of view of a coach using our football software, but the same would apply if you use basketball playbook software or any other package of our software for coaches.
Now that you’ve created your categories, how do you use them? How do they help your team? You can use categories for documents, videos or plays, but we’re going to talk about how to use categories to organize your playbook.
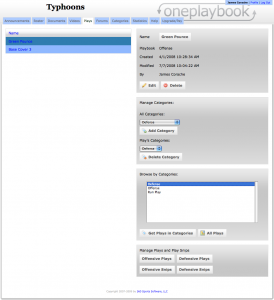
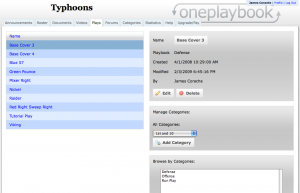
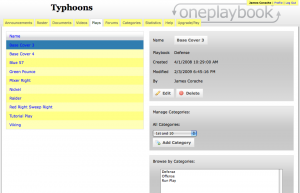
Our first play selected, “Base Cover 3″ is not in a category. When we create a new play, it is not in a category and has to be put into one. You can also tell that it is not in a category because in the Manage Categories box on the right, there is an “Add Category” button, but no “Delete Category” button.
We’re going to take that play and just above the “Add Category” button, we’re going to select “Defense” and then press the button.
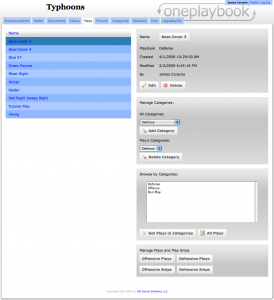
We’ve added Base Cover 3 to the “Defense” category. Notice how the “Delete Category” button is visible now.
Notice that there is now a “Delete Category” button. This lets us remove something from a category if we want.
Below the Manage Categories box, there is another box: Browse by Categories. This area is the heart and soul of categories and is very important as you add more and more plays to your online playbook software.
Right now we have ten plays for simplicity, but when you have one hundred plays or more in your playbook, categories are crucial.
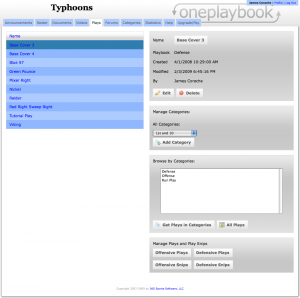
We’re going to select “Defense” in the Browse by Categories area, and then press the “Get Plays in Categories” button.
Now there are only two plays showing. These are the plays that are under the category “Defense” and only the plays that are under that category. This way, if your player is only looking for certain kinds of plays, he can quickly and easily find them.
To go back to the full, list, all we have to do is press the “All Plays” button, and all of the plays will show again.
What we can also do is select multiple categories at once. This is where the true strength of OnePlaybook’s categories lie.
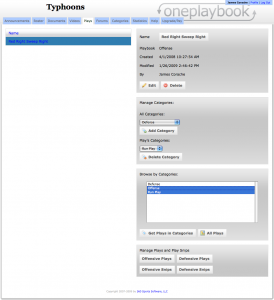
We’re going to search for both “Offense” and “Run Plays” by selecting both of those categories in the Browse by Categories area. This will give us only plays that are filed under both categories.
Our play Red Right Sweep Right is the only play that shows up because it is the only play filed under both “Offense” and “Run Plays.”
Going back to our football software example. Say you’re offensive tackle logs into your OnePlaybook account. He can go to your Plays tab and see all of your plays, but a lot of those don’t matter to him.
What he can do is look for all of your “Offense” plays or “Run Plays.” Or he can look for “3rd and Long,” “Shotgun,” “Four Wide Receiver,” “Slide Protection” plays. Now he gets a list of one or more plays that fit those criteria and quickly finds what he is looking for.
Categories are a very powerful feature that any coach can benefit immensely from.
As coaches, it’s easy to have a lot of different plays to use in a lot of different situations. Sometimes, having so many plays can lead to an encyclopedia-sized playbook, which not only doesn’t lead to a very green playbook, it can also confuse your players.
Say, for example, you’re a football coach. You’ve started using our software for football coaches, but you find that you’ve added a lot of plays to your online playbook. You don’t want your players to get confused because they’re looking at a ton of plays all in one place. They may only be looking for one kind of play or their only looking for your offensive playbook or special teams playbook.
Categories is your answer. When you have a play, there are often a lot of ways to describe it. Back to the football playbook software example, you can use categories to designate run plays, offensive plays, power plays, any possible options that you might want. Some coaches might make categories based on position, down-and-distance or field position. The beauty of categories is that as a coach, you have full control over what they are and what they do.
In this tutorial we’re going to go over how to add and edit categories as well as what you can use them for. You can add as many categories as you like and name them whatever you would like. There will be another tutorial about how to categorize your plays in your online playbook.
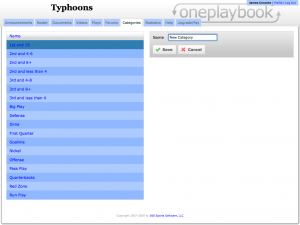
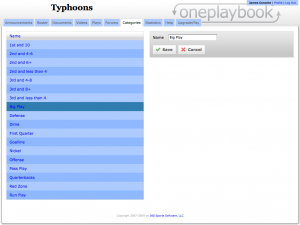
Adding a new category is very easy. Press on the Add button on the right, and a new text box will appear where you can type in the name of your category.
The new category is added immediately and is ready for you to use to get your team more organized.
Again, categories can be anything you would like. If you want to use categories for Documents, then you can add a category like “Medical Forms,” “Workout Plans,” or “Schedules.” They are very flexible and easy-to-use.
If you’ve named a category and realized you mistyped something or that you want to change them name, you can always delete it, but you can edit that category as well.
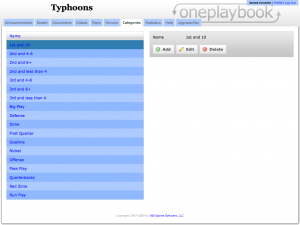
Just click on the category on the left, and its information will be shown on the right. Pressing on the Delete button deletes that category, and the Edit button lets you change the name of the category. Simply Save, and move on your way to another feature of our online coaching software.
Every team has their own colors and their coaching software and playbook should reflect that, right? Right.
Here we’ll walk through how to make OnePlaybook your own and change the color scheme as well as show some of the color schemes available.
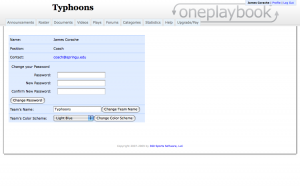
What you’ll notice on the right is the color scheme that every OnePlaybook team starts with. The color scheme is named “Light Blue” and is the basic color scheme.
You can change your team’s color scheme by navigating to the profile page by clicking on the Profile link at the top right.
The bottom option allows a coach to select which color scheme they would like to have. The layout, usability and useage of your web application for coaches will not change, just the colors of items within it.
There are currently eight different color schemes a coach can choose for his team, but if you can request an additional color scheme for your team and we would be happy to add it.
Now we’ll show a few of the different color schemes available for coaches.
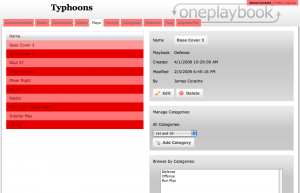
A red theme is available for teams. So, whether your the Cardinals, Red Raiders or other team, you can have a red color scheme for your team.
Another popular color scheme is the Blue and Yellow theme.
Again, you can notice that even though the colors change, the layout and functionality of your coaching software stays the same. This means that even if you change your color scheme often (maybe you want your players to see the color scheme of your next opponent to get them psyched-up), your players will always know exactly what’s going on and how to use your OnePlaybook account.
In all, the eight color schemes currently available are Light Blue, Dark Blue, Light Green, Dark Green, Purple, Red, Blue and Yellow, and Purple and Yellow. Since OnePlaybook builds the software coaches want, you can always request an additional or different color scheme as well.
When you sign up for your online playbook, you get to create your password. Like most services recommend, I would recommend using something that is easy to remember, hard to guess, and changing the password time to time. After you create your players or coaches, you determine their password. However, that’s not always the password they want. How do we fix both of these problems and change our password?
At the top right of every page of your online playbook, there is a link named Profile. It’s right between your name and the Log Out link.
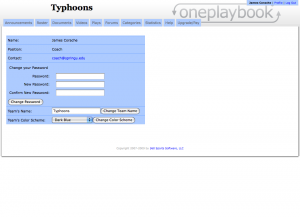
We’re going to press on that link as our first step. Here is some information about us and our team, like our name, position, email, our team’s name and team’s color scheme.
Probably the most important part is the Change Your Password area and this is the area we’re concerned with. This is pretty standard and accepted for most web applications to the point of it being assumed there will be a section like this, and in our playbook web application it’s the same.
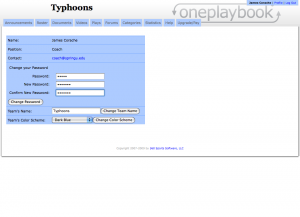
In the first area, we type in our old password. That’s simple and straightforward. In the next two sections, we are going to type in our desired new password twice. We do it twice to make sure that the password is correct and there aren’t any mistakes.
We can then press the Change Password button and instantly our password has been changed. After that, we can continue using our online playbook as normal.
When we logout after we’re done, the next time we come to OnePlaybook and want to login, we just have to use our new password, and we will be all set.
One thing that really sets OnePlaybook apart from other online playbook solutions or playbook software packages is the ability to easily and quickly use video. Since our recent HD video online playbook announcement, this is an even more coveted feature, so let’s break down how to upload video to your online playbook.
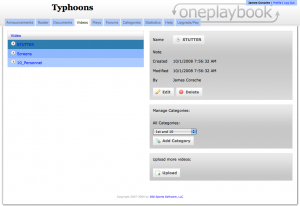
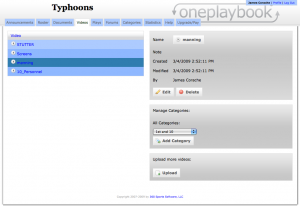
This is what a team's online playbook's video section looks like, with the videos listed on the left.
When a coach presses on Videos tab to go to the videos section of his online playbook, this is the page he sees.
The videos he has uploaded are shown on the left, with information about the selected video on the right, and the button to bring him to the upload page on the bottom right.
To upload a video, we’re going to press on that Upload button down at the bottom.
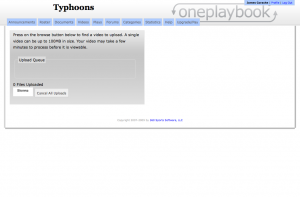
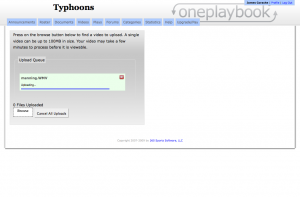
OnePlaybook's online playbook uploading area which is where a coach uploads videos as well as documents.
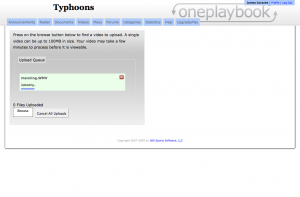
This brings us to the upload page. When we press on the Browse button, a dialog pop-up appears that allows us to select multiple videos to upload.
The video will then upload. Make sure that you stay on the same page and don’t navigate away because your video will be lost. The time the upload takes depends on the video file’s size, which can be determined by the length, quality and type of file.
The types of files that OnePlaybook supports with its online playbook are avi, asf, flv, m4v, mov, mp4, m4a, 3gp, 3g2, mj2 and wmv. If you need help clarifying what any of these formats mean, just comment below.
Once the videos are uploaded, they are converted to flv files to ensure that the most possible people will be able to view them as Flash is the most widely supported medium for video. The process of converting them will take a few minutes, so after you video has been uploaded, it will not be immediately available.
When the video is finished loading, the status will show Finished and then the box with the upload information will dissappear. This just means that it’s done uploading, not that it has been deleted.
As the video is uploading, or at any time, you can cancel the upload or start to upload another video with no problem. It will simply add that video to the queue.
Now that our video has uploaded, it is available in the Video section of our online playbook for our team to see.
We can press on the play arrow to the left of the name to play the video or press on the name to select it and then press on the video’s name on the right to play it.
OnePlaybook allows a coach to easily integrate video into his or her online playbook whether you draw football plays online or use it for another sport and it is one of the most cutting-edge features of the package.
 Subscribe in an RSS Reader
 Subscribe by Email