Written on February 9, 2009 at 4:28 pm by Brian Manning
About Play Editor, Plays, Screenshot
Though OnePlaybook has been developed for many sports and this tutorial applies to many different sports’ plays and playbooks, this is going to be a walk through on how to use OnePlaybook’s play drawing feature.
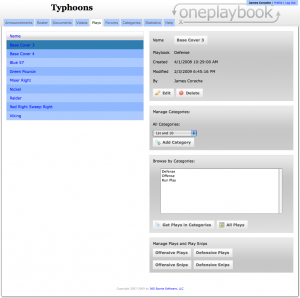
These are individual plays drawn for a team's online playbook.
When a coach or a player clicks on the Plays tab, they are brought to a page that lists all of their plays drawn in their online playbook.
On the left is the name of each play, and when you click on a name, you select a play and information about that play, like who drew it and when, displays at the top right.
In addition, there are sections below for browsing based on categories, as well as placing plays in categories.
At the bottom right, there are four buttons, Offensive Plays, Defensive Plays, Offensive Snips and Defensive Snips. Snips save a coach time creating his playbook be reusing key parts of the play.
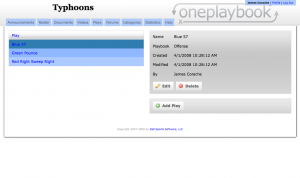
A listing of offensive plays that coaches have created for their team.
When we press on the Offensive Plays button, we go to a page where we have fewer plays listed because they are only the plays in the offensive playbook. This allows offensive coaches and defensive coaches the ability to easily find their information.
When we press on the Add Play button at the bottom right, we come to the editor page.
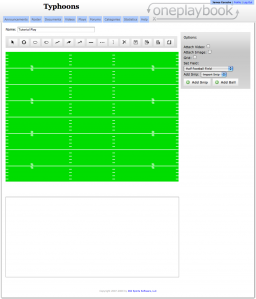
A blank play using a section of a football field to draw on.
We come to a blank editor page where we have a lot of tools a coach can work with on his or her playbook. We’ll talk about each tool we use as we use it, and we’ll cover other tools at another time.
First, we’re going to name the play at the top left. We’re going to make this one pretty generic, Tutorial Play for our playbook software tutorials. Since we’re creating a football play for a football playbook, we’re going to use a part of a football field to draw on. All of the techniques here would work for a football playbook, or a basketball playbook, or any other sport’s playbook.
We’re going to add a player first by pressing on the third button, the oval and then pressing on our football field.
Now that that player is there, we’re going to want a smaller oval than that.
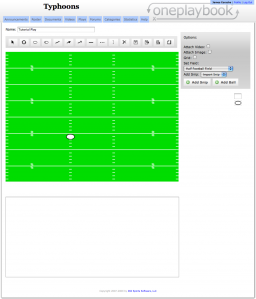
We've added one player to our football play.
Notice how there is a new oval and box on the right below the gray area? That’s for our new player, and we can change his shape by pressing on the picture of his shape.
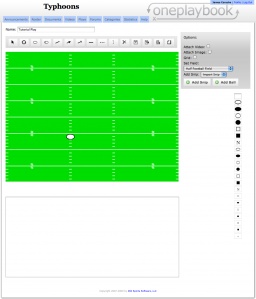
We can click on the football player's symbol on the right to change it.
After clicking on the symbol, a new group of symbols appear and we can press on one of those and our player’s shape changes. This way a coach has a variety of symbols and shapes to use in his playbook.
Now, let’s do that with eleven more football players and draw a full football formation. Once they have been added, if they are not in the right place, we can use the Select button above the field all the way on the left. It has an arrow pointing up and to the left, like a cursor.
Once we press on it, we can press on players and drag them to where we want them in our play.
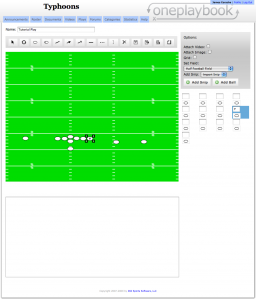
We've now draw our eleven football players and have started naming them.
Once we draw that full formation and all of our players are in the right place, we now have almost everything we need to finish a basic play for our football playbook.
However, we also want to differentiate those players beyond having them be the same simple ovals. To do that, we can write one or two letters in the boxes at the right, and it will add those letters to the appropriate player on the field.
We’ll do that to a few players and then get to the final part of the play, the lines!
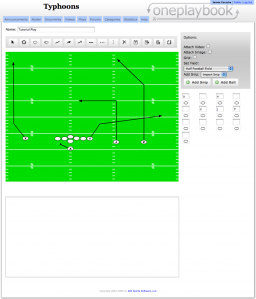
Lines can show whatever a coach wants them to show, in this case, it's where the players should move.
There are solid lines, dashed lines, lines with arrows at the end and lines with flat pieces at the end, usually for blocks or picks, but again, a coach has full control over what anything means.
When you draw a line, you press in one place and drag to another. Once a line has been drawn, you can select it with the Select button, just like a player, and drag it, or drag the ends to re-size it. In addition, you can select it and then press on what kind of line you want it to be. So, if you drew a regular solid line, but wanted to change it to an arrow, you can select it and then press on the arrow line button at the top.
Finally, to make it even easier for players to understand our plays and our playbook, we’re going to add some text at the bottom.
In this case, it’s some very simple text, but coaches can write whatever they want to make their online playbook simpler and easier to use.
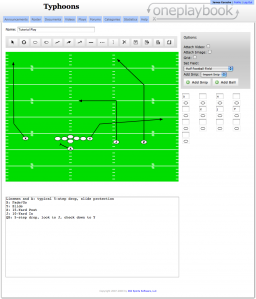
We can add text to our football play, likes rules or scouting information.
There are many more options, as you can see in the images, but we want a simple football play, nothing more. In later sports software tutorials, we’ll be doing things with video, images and text on the field, but those are things for later.
Of course though, we want to save our play! There is a disk button at the top to save the play. In addition, there is a disk with a plus if you’re editing a play and you don’t want to overwrite the old play.
We’ll go with the save button now and then head back to the plays page. From there, we’ll press on the plays name in the list on the left. It’s now been immediately added to all of the old plays in our playbook.
We can then see information on the right like when the play was created and by who. We’re going to press on the button with the plays name so that we can see our football play just like our football players see it.
And there it is, a newly created football play has been added to our online football playbook, quickly and easily.
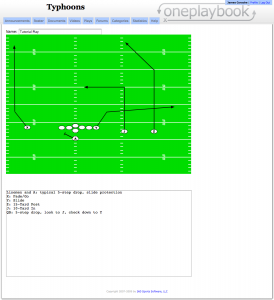
Our football play in our playbook from a player's perspective.
Again, all of these techniques work for any sport, but in this example, we were a football coach creating a football play.
You can use the form below to ask any questions you may have.
In addition, everything is editable and nothing is permanent. A coach can play around with the tools and change the play, and always delete it later.
Finally, there are more tutorials to come about our play editor and the tools available for a coach.


 Subscribe in an RSS Reader
 Subscribe by Email