When you sign up for your online playbook, you get to create your password. Like most services recommend, I would recommend using something that is easy to remember, hard to guess, and changing the password time to time. After you create your players or coaches, you determine their password. However, that’s not always the password they want. How do we fix both of these problems and change our password?
At the top right of every page of your online playbook, there is a link named Profile. It’s right between your name and the Log Out link.
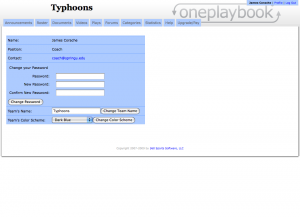
We’re going to press on that link as our first step. Here is some information about us and our team, like our name, position, email, our team’s name and team’s color scheme.
Probably the most important part is the Change Your Password area and this is the area we’re concerned with. This is pretty standard and accepted for most web applications to the point of it being assumed there will be a section like this, and in our playbook web application it’s the same.
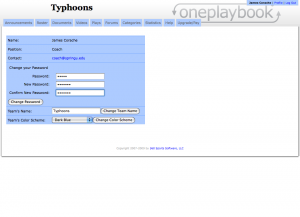
In the first area, we type in our old password. That’s simple and straightforward. In the next two sections, we are going to type in our desired new password twice. We do it twice to make sure that the password is correct and there aren’t any mistakes.
We can then press the Change Password button and instantly our password has been changed. After that, we can continue using our online playbook as normal.
When we logout after we’re done, the next time we come to OnePlaybook and want to login, we just have to use our new password, and we will be all set.
One thing that really sets OnePlaybook apart from other online playbook solutions or playbook software packages is the ability to easily and quickly use video. Since our recent HD video online playbook announcement, this is an even more coveted feature, so let’s break down how to upload video to your online playbook.
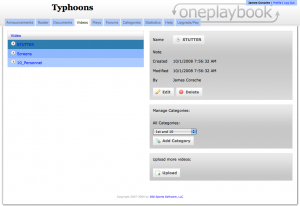
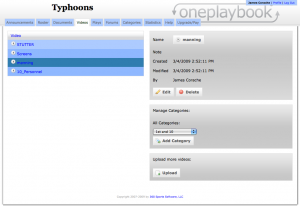
This is what a team's online playbook's video section looks like, with the videos listed on the left.
When a coach presses on Videos tab to go to the videos section of his online playbook, this is the page he sees.
The videos he has uploaded are shown on the left, with information about the selected video on the right, and the button to bring him to the upload page on the bottom right.
To upload a video, we’re going to press on that Upload button down at the bottom.
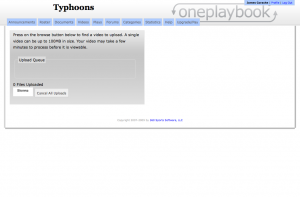
OnePlaybook's online playbook uploading area which is where a coach uploads videos as well as documents.
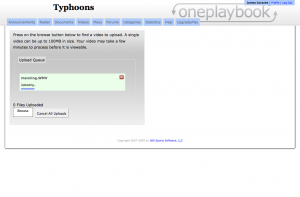
This brings us to the upload page. When we press on the Browse button, a dialog pop-up appears that allows us to select multiple videos to upload.
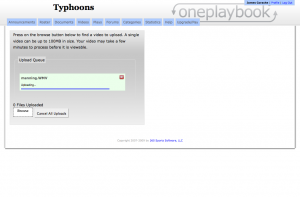
The video will then upload. Make sure that you stay on the same page and don’t navigate away because your video will be lost. The time the upload takes depends on the video file’s size, which can be determined by the length, quality and type of file.
The types of files that OnePlaybook supports with its online playbook are avi, asf, flv, m4v, mov, mp4, m4a, 3gp, 3g2, mj2 and wmv. If you need help clarifying what any of these formats mean, just comment below.
Once the videos are uploaded, they are converted to flv files to ensure that the most possible people will be able to view them as Flash is the most widely supported medium for video. The process of converting them will take a few minutes, so after you video has been uploaded, it will not be immediately available.
When the video is finished loading, the status will show Finished and then the box with the upload information will dissappear. This just means that it’s done uploading, not that it has been deleted.
As the video is uploading, or at any time, you can cancel the upload or start to upload another video with no problem. It will simply add that video to the queue.
Now that our video has uploaded, it is available in the Video section of our online playbook for our team to see.
We can press on the play arrow to the left of the name to play the video or press on the name to select it and then press on the video’s name on the right to play it.
OnePlaybook allows a coach to easily integrate video into his or her online playbook whether you draw football plays online or use it for another sport and it is one of the most cutting-edge features of the package.
Every coach has a list of their team somewhere, and they don’t want to have to enter all of that information again, do they? OnePlaybook makes it easy to add your entire team all at once so you don’t have to sit there entering each individual’s information into our playbook software. Let’s see how it works.
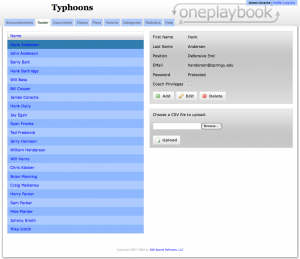
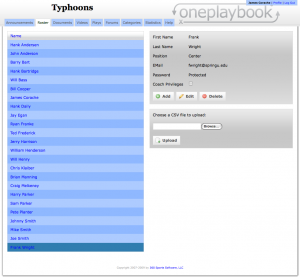
Here is a normal OnePlaybook's team's roster. Notice on the right hand side, the second gray area reads "Choose a CSV file to upload."
First, a coach just has to log in and go to the Roster page. You can see here that there is a section towards the bottom right that reads “Choose a CSV file to upload:” with a Browse button.
Well, what is a CSV file? That’s the abbreviation for Comma-Seperated Values, and can also be called a Comma Delimited File. Essentially it is a spreadsheet where instead of lines showing the different rows and columns, commas do that instead.
So, let’s fire up Excel (or your favorite spreadsheet application).
I’ve created a simple spreadsheet with two entries as an example. The colums are for first name, last name, position, email and password, just like when a coach wants to enter a single player’s or coaches’ information.
Notice in my spreadsheet that even though those are clearly what each column is for, I do not have labels at the top for those columns. Otherwise, I would end up with a player called “First Name Last Name” play at “Position” and have an email of “Email.”
Now, I am going to select “File” then “Save As…”
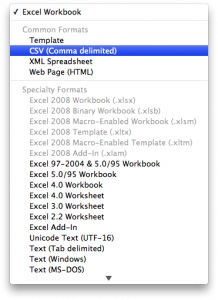
Depending on the program you are using, it may appear slightly differently, but you are looking for a drop-down that will be labeled something like “Format.”
Pressing on that will give you a lot of options and you want to select CSV or Comma Delimited.
After saving, you may be asked a few questions depending on your software. All you have to do is hit Ok or Yes to get through those.
We’ll go back to our team’s OnePlaybook Roster page now. We are going to hit Browse and find where we saved our CSV file. Just select it and press Open and we’ll come back to the Roster page.
The last step is to hit the Upload button below. After a few seconds, our file will upload and our team will be added.
All of the new coaches and players will be added and sent a notification email.
Our player and coach have been added quickly and easily so they can immediately start using our online playbook software. One thing to notice is that every player or coach is initially added as a player, so you will need to quickly edit coaches and give them coach priveleges on the Roster page.
The last thing to realize is that there are a lot of different spreadsheet programs available, so saving a CSV file might be slightly different based on your application and version. If you have problems, please contact us or use the comments section below and I’d be happy to work things through with you.
Though OnePlaybook has been developed for many sports and this tutorial applies to many different sports’ plays and playbooks, this is going to be a walk through on how to use OnePlaybook’s play drawing feature.
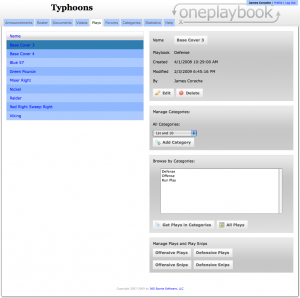
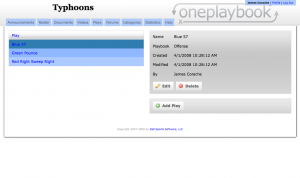
When a coach or a player clicks on the Plays tab, they are brought to a page that lists all of their plays drawn in their online playbook.
On the left is the name of each play, and when you click on a name, you select a play and information about that play, like who drew it and when, displays at the top right.
In addition, there are sections below for browsing based on categories, as well as placing plays in categories.
At the bottom right, there are four buttons, Offensive Plays, Defensive Plays, Offensive Snips and Defensive Snips. Snips save a coach time creating his playbook be reusing key parts of the play.
When we press on the Offensive Plays button, we go to a page where we have fewer plays listed because they are only the plays in the offensive playbook. This allows offensive coaches and defensive coaches the ability to easily find their information.
When we press on the Add Play button at the bottom right, we come to the editor page.
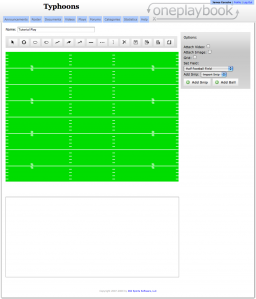
We come to a blank editor page where we have a lot of tools a coach can work with on his or her playbook. We’ll talk about each tool we use as we use it, and we’ll cover other tools at another time.
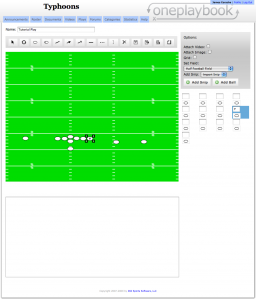
First, we’re going to name the play at the top left. We’re going to make this one pretty generic, Tutorial Play for our playbook software tutorials. Since we’re creating a football play for a football playbook, we’re going to use a part of a football field to draw on. All of the techniques here would work for a football playbook, or a basketball playbook, or any other sport’s playbook.
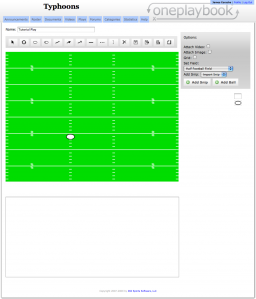
We’re going to add a player first by pressing on the third button, the oval and then pressing on our football field.
Now that that player is there, we’re going to want a smaller oval than that.
Notice how there is a new oval and box on the right below the gray area? That’s for our new player, and we can change his shape by pressing on the picture of his shape.
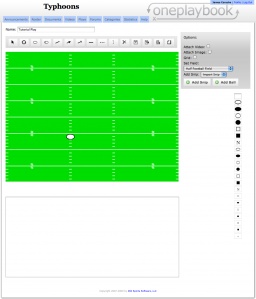
After clicking on the symbol, a new group of symbols appear and we can press on one of those and our player’s shape changes. This way a coach has a variety of symbols and shapes to use in his playbook.
Now, let’s do that with eleven more football players and draw a full football formation. Once they have been added, if they are not in the right place, we can use the Select button above the field all the way on the left. It has an arrow pointing up and to the left, like a cursor.
Once we press on it, we can press on players and drag them to where we want them in our play.
Once we draw that full formation and all of our players are in the right place, we now have almost everything we need to finish a basic play for our football playbook.
However, we also want to differentiate those players beyond having them be the same simple ovals. To do that, we can write one or two letters in the boxes at the right, and it will add those letters to the appropriate player on the field.
We’ll do that to a few players and then get to the final part of the play, the lines!
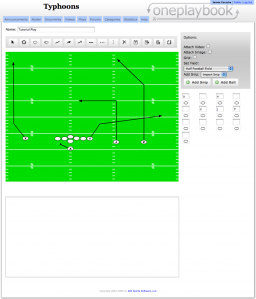
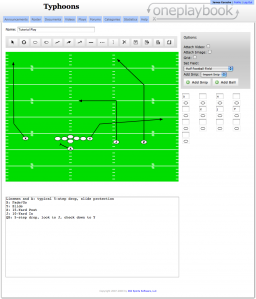
Lines can show whatever a coach wants them to show, in this case, it's where the players should move.
There are solid lines, dashed lines, lines with arrows at the end and lines with flat pieces at the end, usually for blocks or picks, but again, a coach has full control over what anything means.
When you draw a line, you press in one place and drag to another. Once a line has been drawn, you can select it with the Select button, just like a player, and drag it, or drag the ends to re-size it. In addition, you can select it and then press on what kind of line you want it to be. So, if you drew a regular solid line, but wanted to change it to an arrow, you can select it and then press on the arrow line button at the top.
Finally, to make it even easier for players to understand our plays and our playbook, we’re going to add some text at the bottom.
In this case, it’s some very simple text, but coaches can write whatever they want to make their online playbook simpler and easier to use.
There are many more options, as you can see in the images, but we want a simple football play, nothing more. In later sports software tutorials, we’ll be doing things with video, images and text on the field, but those are things for later.
Of course though, we want to save our play! There is a disk button at the top to save the play. In addition, there is a disk with a plus if you’re editing a play and you don’t want to overwrite the old play.
We’ll go with the save button now and then head back to the plays page. From there, we’ll press on the plays name in the list on the left. It’s now been immediately added to all of the old plays in our playbook.
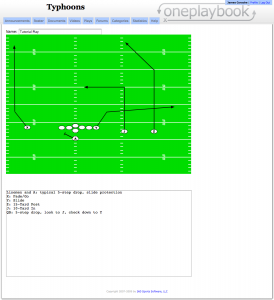
We can then see information on the right like when the play was created and by who. We’re going to press on the button with the plays name so that we can see our football play just like our football players see it.
And there it is, a newly created football play has been added to our online football playbook, quickly and easily.
Again, all of these techniques work for any sport, but in this example, we were a football coach creating a football play.
You can use the form below to ask any questions you may have.
In addition, everything is editable and nothing is permanent. A coach can play around with the tools and change the play, and always delete it later.
Finally, there are more tutorials to come about our play editor and the tools available for a coach.
With the OnePlaybook sports software package, coaches have a new and unique way to communicate with their players. Normally, a phone list, an email list or handouts might be the way a coach would contact his players and give them important information. Now, a modernized sports coach can leverage the communication features in our sports software to get that information to them faster and easier by using announcements.
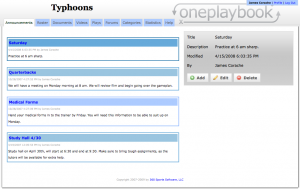
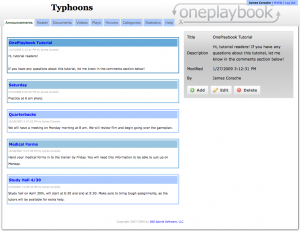
When a coach or player first logs into OnePlaybook, they are immediately brought to the team’s Announcements tab. Here coaches can add, edit or delete announcements, allowing him to put important information all in one place. Whether it’s a team schedule, practice updates, thoughts on the last game or a small pep talk, a coach has a central place for that information. The posts are shown with the most recent at the top so players know immediately when something has changed.
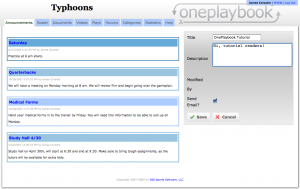
For a coach to add a new announcement, he just presses on the Add button in the gray area. That gray area will then be replaced with a section for a coach to type in a title for the announcement as well as the announcement itself.
In addition, a coach can send that announcement as an email as well as posting it on his or her OnePlaybook account. All the coach has to do is check the checkbox below the areas with the typed announcement. This just gives another way for coaches to make sure that their players are always up to date.
The coach can now press the Save button and the announcement will be posted. The announcement is posted right away, so if a player is logged into the team’s personal OnePlaybook site, when he or she goes to the Announcement tab, he or she will instantly see that new announcement.
Announcements make it easy for coaches to use their sports software to quickly get in touch with their players.

 Subscribe in an RSS Reader
 Subscribe by Email